Last week, I came across a simple trick to emulate auto-tinting inside Figma based on any background color. Particularly useful when you are designing for dynamic themed UI (Material You for example).
🧵 Here's a mini thread on how to achieve this effect:
0:000:00
TLDR: This is a pure blending mode play → 4 fills.
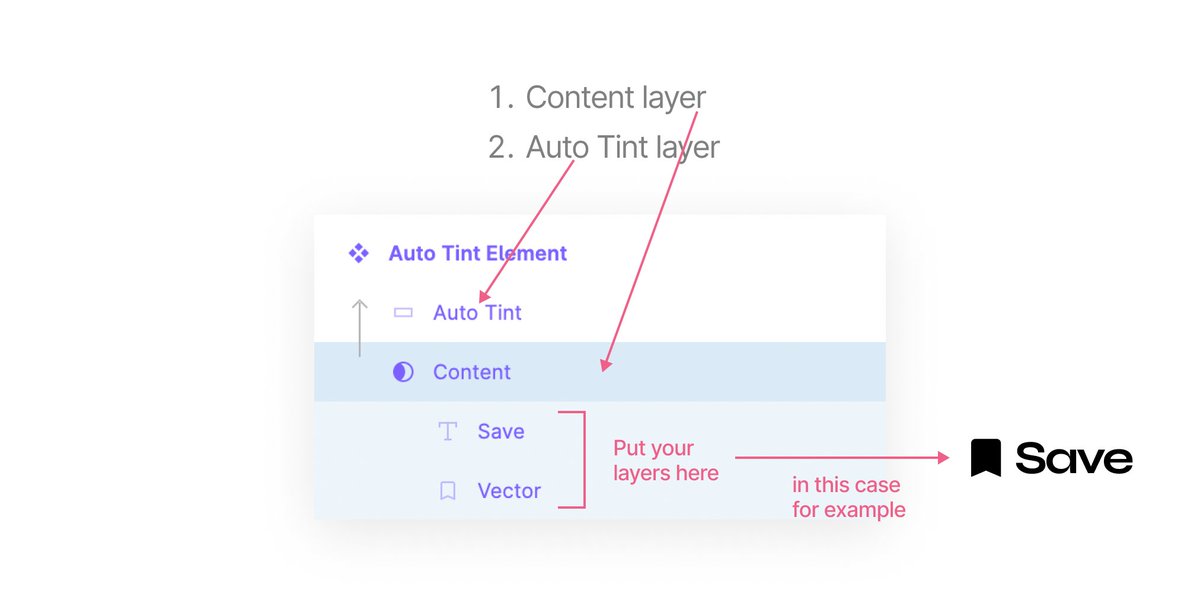
1. Put a frame around the elements you want auto-tint on. I have taken a icon & text layer for simplicity.
2. Draw a rectangle (any size) & mask it over the above content frame.
Making it a component → optional/as per need.
3. To the auto-tint layer/rectangle:
a. Add a White fill with Difference blending mode.
b. Add another White fill with Saturation blending mode.
Difference inverts your layer colors depending on background. Saturation limits them to greyscale only.
But contrast? not yet! 🙁
3. To the auto-tint layer/rectangle (contd.):
c. Add another White fill with Overlay blending.
d. Add one last Black fill with Overlay blending.
These two fills will now counter the previous two fills to provide enough contrast, no matter what the BG color.
Contrast fixed! 🎉
Play around with the blending modes of the auto-tint layer to create different effects.
Here's an example of how you can achieve cool complementary effects just by turning off the Black fill Overlay (Step 3b) & White fill Saturation (Step 3d).
Cheers! All inputs welcome 🥳 RT


 Pay what you can